Changing Audio & Video Settings in Google Meet
If you are experiencing issues with your camera, microphone, or speakers during a Google Meet please check your video and audio settings first.
Before Joining the Meeting:
- Click Check your audio and video
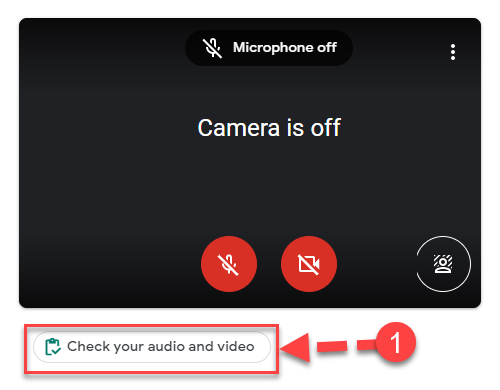
- Click the drop-down arrow next to microphone, speaker, or camera.
- Select a different microphone, speaker, or camera.
- After adjusting, the video should appear or you’ll notice the green dots registering your voice from the microphone.
- To test your audio & video, click Next.

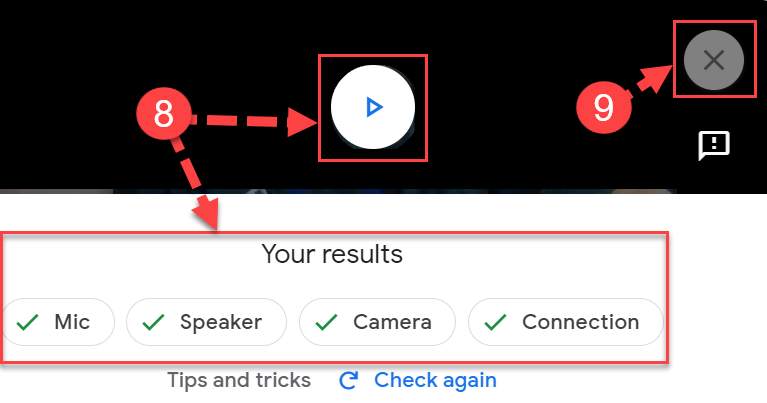
- You have the opportunity to record a short clip to test your camera, microphone, and speakers. Click Start.
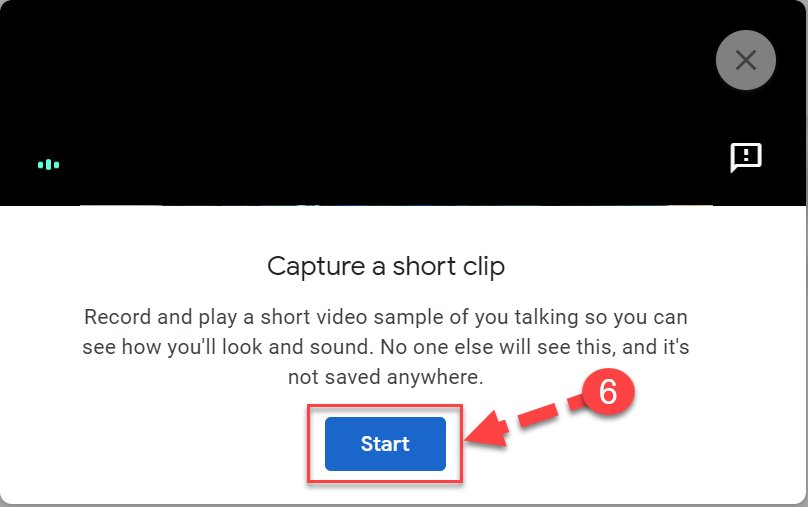
- Follow the directions on the screen by saying something aloud into the microphone such as “I’m testing my audio and video.”
- Click the Play icon to review your recording to confirm your camera, microphone, and speakers are working. You will also notice Your Results below the video.
- If working properly, click the X and then join the meeting.


After Joining the Meeting:
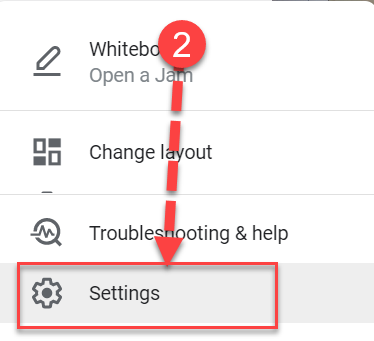
- Click the 3 dots in the bottom right corner of the Google Meet window.

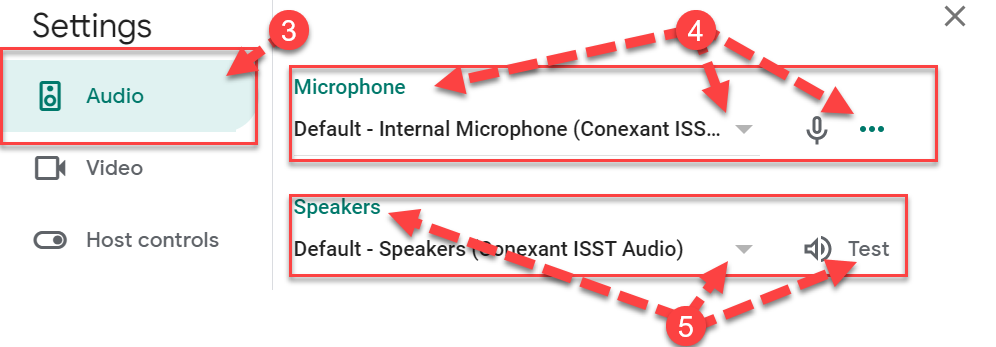
- Click Settings.
- For audio settings, make sure you have Audio selected.
- Under the Microphone heading, click the drop-down arrow to change the microphone. The green dots will move as the microphone registers your voice.
- Under the Speakers heading, click the drop-down arrow to change the speakers. Click Test to test your speakers.

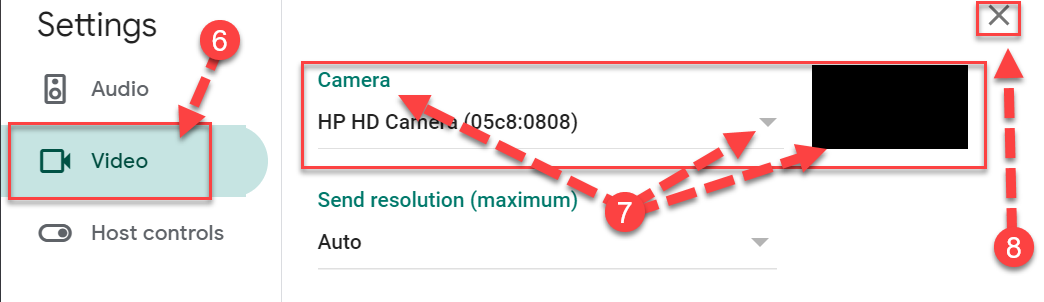
- For video settings, make sure you have Video selected.
- Under the Camera heading, click the drop-down arrow to change the camera. You should see a live video feed on the right-hand side.
- Click the X to close the settings and return to the meeting.